
You love your rental apartment. You hate the blank, bare walls. The good news? You don’t need a single nail, drill, or security deposit scare to create a stunning gallery wall. With the right tools and a bit of planning, renter-friendly gallery walls are not only possible — they’re actually becoming the norm.
According to the U.S. Census Bureau’s American Housing Survey, over 44 million households in the United States rent their homes. And a 2023 survey by Apartment List found that nearly 67% of renters feel their space doesn’t reflect their personality — mostly because they’re afraid to put holes in the walls.
This guide will walk you through everything you need to know to build a beautiful, curated gallery wall in your rental — without risking your deposit, your landlord’s patience, or your walls.
“Your rental is not a waiting room. It’s your home — treat it like one.”

Why Gallery Walls Work So Well in Rentals
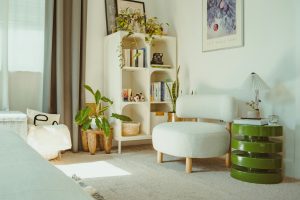
Gallery walls are one of the highest-impact, lowest-commitment ways to personalize a space. Unlike paint or built-in shelving, they’re completely reversible. More importantly, they draw the eye upward, make rooms feel larger, and give even the most generic white-box apartment a sense of soul.
Interior designers consistently rank gallery walls among the top 5 most transformative DIY décor projects for renters, alongside rugs, lighting swaps, and removable wallpaper. The reason? They work in any room, at any budget, and they move with you when you do.
What You’ll Need (No Nails Required)
Before you start, gather your supplies. The key to a renter-friendly gallery wall is using damage-free hanging solutions. Here’s what works best:
- Command Picture Hanging Strips (3M) — the gold standard for renter-friendly hanging. They hold up to 16 lbs per pair and remove cleanly. According to 3M, their large strips can hold frames up to 16 lbs when used in pairs.
- Removable adhesive hooks — great for lightweight prints and frames under 5 lbs.
- Poster tape / double-sided removable tape — ideal for lightweight paper prints and unframed art.
- Washi tape — a decorative option that creates a tape-border “frame” effect around prints, and peels off without damaging walls.
- Lean-and-layer technique — no hanging required. Lean frames against the wall on shelves, mantels, or console tables.
- Gallery rail / picture rail systems — some rentals have pre-installed picture rails; if yours does, use them! If not, freestanding gallery rails that sit behind furniture are available.
“Command strips aren’t just a workaround — they’re a design-forward choice for renters who refuse to compromise on style.”
Step 1 — Choose Your Wall and Vision
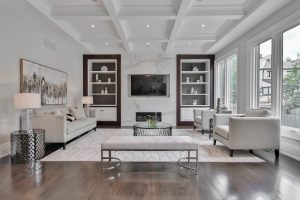
Start by choosing the right wall. The best gallery wall location is typically a large, uninterrupted wall — like the one behind your sofa, above a bed’s headboard, along a hallway, or facing your entry door. These are high-visibility spots that will have the most visual impact.
Next, define your vision. Ask yourself:
- Do you want a cohesive, curated look (matching frames, same color palette) or an eclectic, layered look (mixed frames, varied sizes)?
- What’s the mood — calm and minimal, bold and maximalist, or cozy and personal?
- What types of art will you hang — prints, photos, mirrors, objects, or a mix?
Interior design research shows that odd numbers of frames (3, 5, 7, 9) create more visually dynamic arrangements than even numbers. Start with a central anchor piece and build outward.
Step 2 — Plan Your Layout on the Floor First
This is the step most people skip — and then regret. Before touching the wall, arrange your frames on the floor in front of the wall you’re decorating. This lets you experiment with spacing, orientation, and composition without any commitment.
Pro tips for floor planning:
- Leave 2–3 inches of space between frames for a clean, intentional look. Less than 1.5 inches feels crowded; more than 4 inches can feel disconnected.
- Aim to have your visual center at eye level — roughly 57–60 inches from the floor, which is the standard used by most museums.
- Mix landscape and portrait orientations for visual rhythm.
- Use a variety of frame sizes — at least 3 different sizes creates the most dynamic arrangement.
“The floor is your rehearsal space. Perfect the arrangement there before it ever touches the wall.”

Step 3 — Trace and Template Your Layout
Once you’re happy with your floor layout, trace each frame onto paper or newspaper and cut out the shapes. These paper templates let you map the exact arrangement onto your wall using painter’s tape — without a single mark or hole.
How to do it:
- Trace each frame on kraft paper or newsprint and cut out the shape.
- Mark the hanging point on each template (where the hook or strip will go).
- Use painter’s tape to stick the templates to the wall in your planned arrangement.
- Step back and adjust until it looks exactly right.
- Apply your Command Strips or adhesive hooks directly to the wall through the marked points on the templates, then tear the paper away.
This technique is used by professional interior stylists and is the single biggest time-saver when creating a gallery wall in a rental.
Step 4 — Hang with Confidence (Using the Right Adhesive)
Now it’s time to actually hang. The product you choose matters enormously. Here’s a quick comparison of the most popular renter-friendly hanging options:
| Product | Max Weight | Best For | Removal |
|---|---|---|---|
| Command Large Strips (pair) | 16 lbs | Heavy frames, canvases | Clean stretch release |
| Command Small Strips (pair) | 4 lbs | Light frames, small art | Clean stretch release |
| Removable Adhesive Hooks | 3–5 lbs | Lightweight prints | Warm water or tab release |
| Poster Mounting Tape | 2 lbs | Paper prints, posters | Gentle peeling |
| Washi Tape | < 1 lb | Ultra-lightweight, decorative | Easy peel, no residue |
Important: Always check the weight of your frame before choosing your adhesive. Most frames include weight information on the back or packaging. When in doubt, use more strips — it’s better to over-hang than to lose a frame.
Step 5 — Curate Your Art (What Actually Goes On the Wall)
The art is where personality comes in. A gallery wall doesn’t need to be expensive — in fact, some of the most beautiful gallery walls are made from entirely free or very affordable sources. Here are ideas for every budget:
Free and Low-Cost Art Sources
- Unsplash / Pexels — free high-resolution photography you can print at home or at a print shop.
- Canva — create your own art, quotes, or typographic prints for free.
- Thrift stores and estate sales — vintage frames and original art often sell for under $5.
- Your own photos — printed through services like Artifact Uprising, Shutterfly, or IKEA.
- IKEA BJÖRKSTA / RIBBA prints — affordable art prints in ready-made gallery-style frames.
- Society6 / Redbubble — independent artist prints from $10–$25.
- Old books and magazines — botanical illustrations, maps, and vintage typography make excellent framed prints.
What to Mix In (Beyond Prints)
The most interesting gallery walls aren’t just flat prints. Consider mixing in:
- Mirrors — add depth and light (use Command strips rated for the weight).
- Woven wall hangings or macramé — adds texture and warmth.
- Dried botanicals in frames — a timeless, nature-forward touch.
- Decorative plates — use plate-hanging discs with adhesive backing.
- Shadow boxes — display small objects, collections, or mementos.
“A gallery wall is a portrait of who you are. Let it include more than just pictures.”
Step 6 — The Finishing Touches That Make It Look Professional
Once your frames are up, a few final details will take your gallery wall from “pretty good” to “did an interior designer do this?”
- Use a level app on your phone — a straight frame makes a world of difference. Most smartphones have a built-in level or you can use a free app.
- Add small foam bumpers to the bottom corners of frames — this keeps frames level over time and protects the wall finish.
- Consider the lighting — a plug-in picture light, a directional floor lamp, or warm-toned string lights can dramatically enhance your gallery wall without any installation.
- Create a sense of depth — lean a few frames against the wall in front of your hung arrangement to add a layered, editorial feel.
- Unite the arrangement — if your frames feel disconnected, add a unifying element: a consistent mat color, a shared frame finish, or a repeating motif across the prints.
How to Remove Your Gallery Wall When You Move Out
This is the part renters worry about most — and it’s actually the easiest part. Here’s how to remove Command Strips and adhesive products cleanly:
- Grasp the pull tab at the bottom of the Command strip and stretch it slowly and steadily downward at a low angle (not outward). The strip elongates and releases cleanly.
- If any residue remains, use a hair dryer on low heat for 20–30 seconds to soften the adhesive, then roll it off with your finger.
- For stubborn residue, rubbing alcohol on a soft cloth removes most adhesive residue without damaging standard painted walls.
- Always test any cleaning method in an inconspicuous spot first, especially on textured or flat-finish paint.
According to 3M’s own testing, Command strips remove cleanly from most painted drywall surfaces when removed as directed — with no wall damage in over 90% of cases.
Gallery Wall Styles to Try Right Now
Need inspiration? Here are five of the most popular gallery wall styles that work especially well in rentals:
1. The Classic Grid
Identical frames (same size, same finish) in a uniform grid. Clean, architectural, modern. Works best with black-and-white photography or botanical prints. Ideal for minimalist or Scandinavian-style spaces.
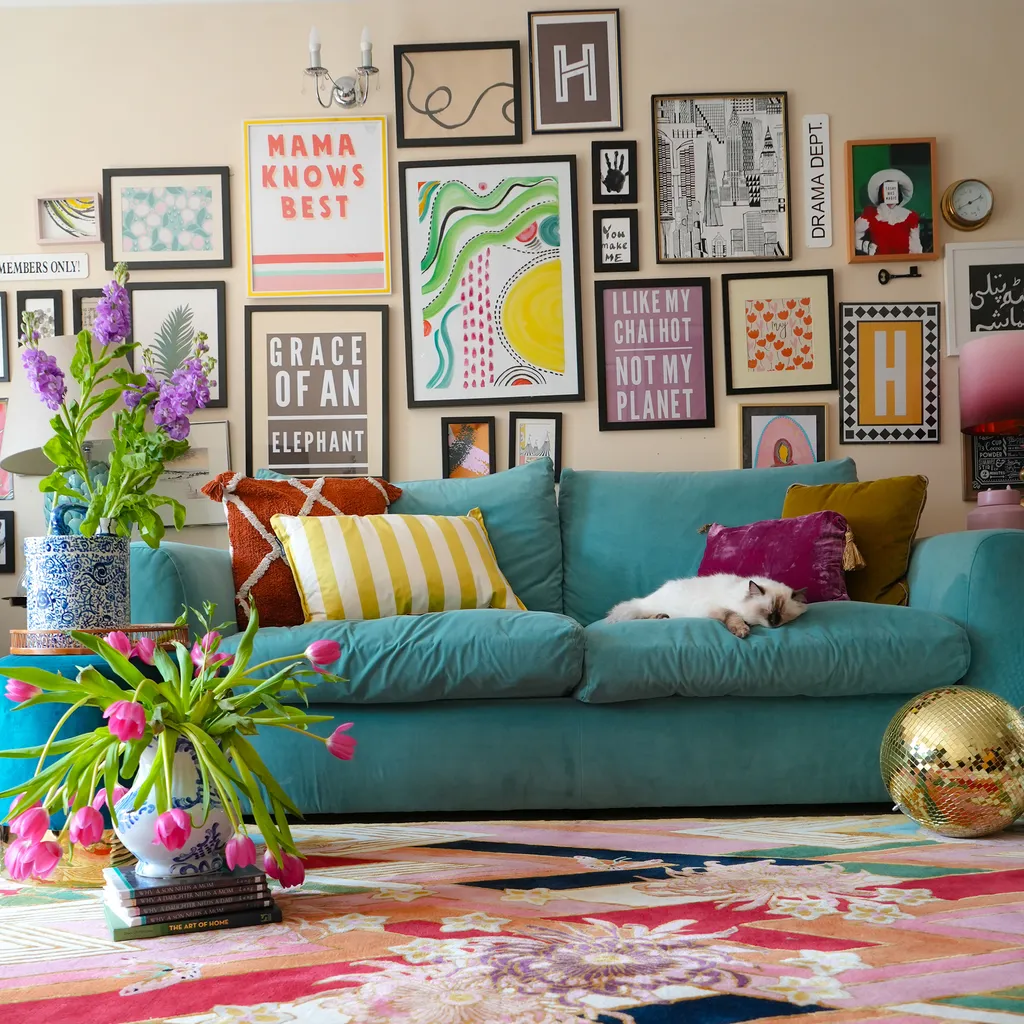
2. The Organic Salon Wall
Mixed frame sizes, varied art styles, and an asymmetrical arrangement that grows organically from a central anchor. Maximalist, warm, and personal. Think layered, lived-in Parisian apartment.
3. The Leaner
No hanging required — everything leans against the wall on shelves, a console, or the floor. Layered, casual, and very flexible. Great for renters who move frequently.
4. The Typographic Story
Quotes, words, and text-based art arranged in a cohesive wall. Can be done with printed quotes, neon signs (renter-friendly options are battery-operated), and letter boards. Personal and statement-making.
5. The Nature Wall
Botanical prints, landscape photography, dried florals, and natural textures. Calm, grounding, and biophilic. Works in every room, especially bedrooms and bathrooms.
Common Gallery Wall Mistakes (And How to Avoid Them)
- Hanging too high. The most common mistake. Center your gallery wall at eye level (57–60 inches from the floor), not at ceiling height.
- All the same size. Uniformity without variation reads flat. Include at least 2–3 frame sizes.
- Ignoring the furniture relationship. A gallery wall above a sofa should span two-thirds to three-quarters of the sofa’s width for balanced proportion.
- Too much empty space between frames. Keep gaps between 2–3 inches. More than 4 inches and the wall starts to feel like a waiting room.
- Skipping the floor plan. Always arrange on the floor first. Always.
- Using the wrong adhesive for the weight. Overloading adhesive strips is the number one cause of fallen frames. Always check weight limits.
Renter-Friendly Gallery Wall: Quick Stats
- 📊 44+ million households in the U.S. rent their homes (U.S. Census Bureau, 2022)
- 🏠 67% of renters say their apartment doesn’t feel like “them” (Apartment List, 2023)
- 🖼️ Command strips remove cleanly in 90%+ of cases when used as directed (3M internal testing)
- 🎨 Gallery walls are the #1 searched DIY décor project on Pinterest (Pinterest Trends, 2024)
- 👁️ Eye-level hanging height is 57–60 inches from floor — the global museum standard
- 📐 2–3 inches between frames is the ideal gallery spacing used by professional stylists
Frequently Asked Questions
Will Command strips damage my rental walls?
When used correctly on standard painted drywall and removed as directed (slow, downward stretch), Command strips remove cleanly without damaging walls in the vast majority of cases. Avoid using them on wallpaper, fresh paint (wait 7 days), or textured surfaces without testing first.
How many frames should a gallery wall have?
There’s no rule, but most designers recommend starting with a minimum of 5 pieces to create a true “wall” effect. The most impactful gallery walls typically feature 7–15 pieces, depending on the wall size. Odd numbers tend to look more dynamic and naturally balanced.
Can I do a gallery wall in a small apartment?
Absolutely — and in fact, a well-planned gallery wall can make a small space feel more intentional and designed. In a small space, stick to a tight grid or a small cluster of 3–5 frames rather than an expansive salon-style arrangement. Use lighter frames and a cohesive color palette to keep the space feeling open.
What type of wall is best for Command strips?
Command strips work best on smooth, clean, dry surfaces including standard painted drywall, painted cinder block, glass, metal, and tile. They do not work well on wallpaper, brick, rough stone, or surfaces with flat or chalky paint finishes. Always clean the surface with isopropyl alcohol before applying and wait one hour before hanging.
Is a gallery wall easy to move?
Yes — that’s one of the best parts of a renter-friendly gallery wall. Because you’re using adhesive strips rather than nails, you can remove the entire arrangement, reposition it, or take it with you when you move. The frame arrangement itself can be photographed and replicated in your next space.
How do I keep frames level over time?
Add small rubber or foam bumpers to the bottom two corners of each frame. This creates grip against the wall surface and prevents frames from tilting. A small piece of museum putty (Blu-Tack or similar) behind the bottom corners also works well for lightweight frames.
The Bottom Line
A gallery wall is one of the most personal, expressive things you can do to a rental space — and with today’s damage-free adhesive products, there’s genuinely no reason to live with blank walls anymore. The key is to plan carefully, use the right products for your frame weights, and remember that the floor is your rehearsal space before anything touches the wall.
Your rental is temporary. Your taste is permanent. Make the walls match.
“You don’t need to own a wall to make it yours.”
Found this helpful? Pin this post, share it with a friend in a rental, or bookmark it for your next move. Got a gallery wall you’re proud of? Drop a photo in the comments — we’d love to see it.